Epic Fail.... or Raving Success?
For quite some time my family's favorite bread has been a recipe from King Arthur flour. We used this bread for everything - for sandwiches, for french toast, a slice with dinner, and even as a snack with honey (well, butter for me, please; I am the only one in the family that does not like honey). And, yes, I was a flour snob and kept King Arthur flour on hand. So it was obvious, at least to me, that it was my goal to make a substitute for this bread using gluten-free ingredients.
Today I braved that daunting task. When my daughter came in the kitchen asking what I was making, I joked that I had no idea; we'd see when it was finished. However, I was quite proud of the texture of the dough and how well it was working. I prayed this would work. I suddenly had high hopes.
When the bread was almost finished, I peeked in the oven. My heart fell. This recipe that I managed to put together was an epic failure. I knew the dough did not rise as much as I thought it should before baking, but after two hours I decided maybe it would rise more in the oven. I have read recipes that said their bread does that. But the bread did not rise. I had two small loves that looked crusty and dry.
As I took the first dastardly loaf out of the oven I decided that I should at least take a picture of it. I have been sharing my successes with you, and other than my very first loaf, this was my first fail. I thought I could encourage you by letting you see that I don't always get it right, and that this is a difficult road for all who travel it. I did not want to just share the successes with you.
I was going to just dump the untouched loaf into the trash. Curiously, though, I figured just for the sake of it I would slice the bread and let you see how awful the inside must have been. It was a little difficult to cut... perhaps that was the crust, perhaps it was the knife I'd chosen. I took a look... Well, it really did not look that bad.

So I took a bite of that first slice. What?! This could not be happening! I rushed to the other room for my husband to take a bite. The look on his face said it all. This was by far the BEST gluten-free bread we'd ever tasted! I am talking taste like 'real' bread good!
I will be working on making a larger loaf - either adding eggs or putting it all in one loaf and adjusting cooking times - anything I think might give us a larger loaf that would be the 'right' size for sandwiches... but really, because of how I'd shaped the dough, this was almost as tall as my beloved hearth bread with which we used to make sandwiches; it was mainly just shorter in length.
In the meantime, try this recipe and make your family think you've made a wheat based bread once again! I am so thrilled I am actually giddy!
If you are not gluten-free, you can follow this same recipe but instead of the gluten-free flour blend use 5 1/2 - 6 cups King Arthur All-Purpose Flour (I prefer their organic one).
At this point you would actually be following King Arthur's Hearth Bread recipe. The only thing here that is 'mine' is the gluten-free blend and the round loaf. Oh, and with this version you can use a dough hook and let your machine do the kneading. Breads with wheat must be kneaded longer than the gluten-free breads.
Sara's Gluten Free Artisan Flour Blend
2 cups brown rice flower
1 1/3 cups potato starch
1 cup almond flour
1/2 cup tapioca flour (starch)
1/3 cup sweet sorghum flour
1/3 cup corn starch (I use a non-GMO brand)
1/4 cup sweet rice flour
1 1/2 TBS xanthan gum
Mix and sift all the above ingredients. You will use most of it in this recipe.
Sara's Gluten Free Hearth Bread
In your mixing bowl (I use a stand-up mixer), combine:
1 TBS active dry yeast
1 TBS sugar
2 tsp salt
2 cups warm water
Let stand until sugar, yeast, and salt are dissolved. It will create a 'sponge.'
With the mixer on low, and using the paddle attachment, slowly add 5 1/2 - 6 cups GF Artisan Flour Blend. Turn the mixer to 2 and continue mixing until well combined.
Using some GF flour blend, dust a work surface with flour. Once the bread dough is blended, turn it out onto the work surface and knead a few times until it feels like a regular bread dough.
Grease the mixing bowl. Return the dough to the bowl and turn the dough over once to grease the top. Cover with a damp towel and let rest for 2 hours. The dough will rise some, but not as much as a wheat version would.
Turn the dough out onto your work surface and shape into loaves. I like to make oblong loaves like a French or Italian loaf and round loaves. I bake the oblong loaves on a cookie sheet and the round loaves in a dutch oven. And since I only have one of each thing, I usually make one oblong and one round each time.
Sprinkle the cookie sheet and/or dutch oven with gluten-free cornmeal. Place the dough on the cookie sheet / dutch oven and let rest 5 minutes.
During these 5 minutes put a roast pan of water on the bottom rack of your oven and turn the oven to 400 degrees.
Brush the loaves with cold water. (Normally in hearth bread you would lightly slash the tops of the loves about 3 times diagonally, but that did not work well on this bread, so skip this step.)
Bake the loaves at 400 degrees for 35-45 minutes.
Immediately take the loaves from the oven to a wire rack or wooden cutting board.
Let cool, slice, and devour!


Today I braved that daunting task. When my daughter came in the kitchen asking what I was making, I joked that I had no idea; we'd see when it was finished. However, I was quite proud of the texture of the dough and how well it was working. I prayed this would work. I suddenly had high hopes.
When the bread was almost finished, I peeked in the oven. My heart fell. This recipe that I managed to put together was an epic failure. I knew the dough did not rise as much as I thought it should before baking, but after two hours I decided maybe it would rise more in the oven. I have read recipes that said their bread does that. But the bread did not rise. I had two small loves that looked crusty and dry.
As I took the first dastardly loaf out of the oven I decided that I should at least take a picture of it. I have been sharing my successes with you, and other than my very first loaf, this was my first fail. I thought I could encourage you by letting you see that I don't always get it right, and that this is a difficult road for all who travel it. I did not want to just share the successes with you.
 |
| Doesn't look very appealing, does it? |
I was going to just dump the untouched loaf into the trash. Curiously, though, I figured just for the sake of it I would slice the bread and let you see how awful the inside must have been. It was a little difficult to cut... perhaps that was the crust, perhaps it was the knife I'd chosen. I took a look... Well, it really did not look that bad.
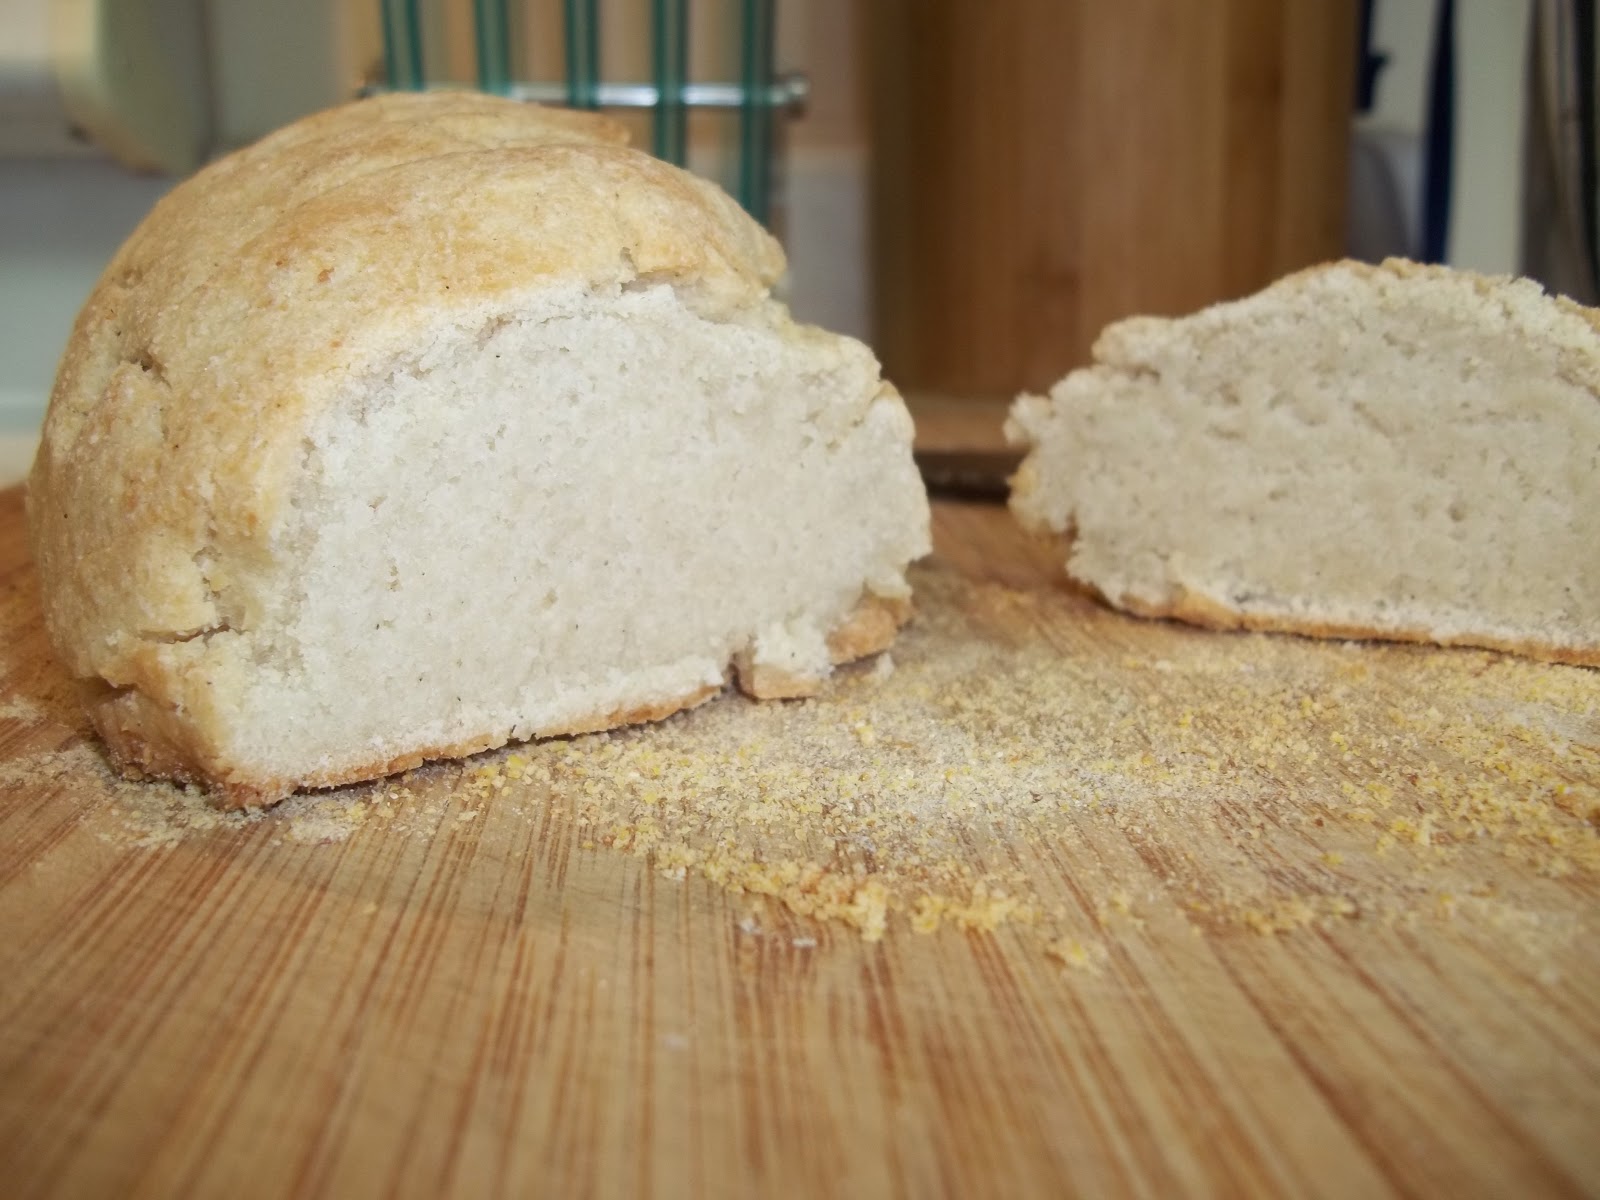
So I took a bite of that first slice. What?! This could not be happening! I rushed to the other room for my husband to take a bite. The look on his face said it all. This was by far the BEST gluten-free bread we'd ever tasted! I am talking taste like 'real' bread good!
I will be working on making a larger loaf - either adding eggs or putting it all in one loaf and adjusting cooking times - anything I think might give us a larger loaf that would be the 'right' size for sandwiches... but really, because of how I'd shaped the dough, this was almost as tall as my beloved hearth bread with which we used to make sandwiches; it was mainly just shorter in length.
In the meantime, try this recipe and make your family think you've made a wheat based bread once again! I am so thrilled I am actually giddy!
If you are not gluten-free, you can follow this same recipe but instead of the gluten-free flour blend use 5 1/2 - 6 cups King Arthur All-Purpose Flour (I prefer their organic one).
At this point you would actually be following King Arthur's Hearth Bread recipe. The only thing here that is 'mine' is the gluten-free blend and the round loaf. Oh, and with this version you can use a dough hook and let your machine do the kneading. Breads with wheat must be kneaded longer than the gluten-free breads.
Sara's Gluten Free Artisan Flour Blend
2 cups brown rice flower
1 1/3 cups potato starch
1 cup almond flour
1/2 cup tapioca flour (starch)
1/3 cup sweet sorghum flour
1/3 cup corn starch (I use a non-GMO brand)
1/4 cup sweet rice flour
1 1/2 TBS xanthan gum
Mix and sift all the above ingredients. You will use most of it in this recipe.
Sara's Gluten Free Hearth Bread
In your mixing bowl (I use a stand-up mixer), combine:
1 TBS active dry yeast
1 TBS sugar
2 tsp salt
2 cups warm water
Let stand until sugar, yeast, and salt are dissolved. It will create a 'sponge.'
With the mixer on low, and using the paddle attachment, slowly add 5 1/2 - 6 cups GF Artisan Flour Blend. Turn the mixer to 2 and continue mixing until well combined.
Using some GF flour blend, dust a work surface with flour. Once the bread dough is blended, turn it out onto the work surface and knead a few times until it feels like a regular bread dough.
Grease the mixing bowl. Return the dough to the bowl and turn the dough over once to grease the top. Cover with a damp towel and let rest for 2 hours. The dough will rise some, but not as much as a wheat version would.
Turn the dough out onto your work surface and shape into loaves. I like to make oblong loaves like a French or Italian loaf and round loaves. I bake the oblong loaves on a cookie sheet and the round loaves in a dutch oven. And since I only have one of each thing, I usually make one oblong and one round each time.
Sprinkle the cookie sheet and/or dutch oven with gluten-free cornmeal. Place the dough on the cookie sheet / dutch oven and let rest 5 minutes.
During these 5 minutes put a roast pan of water on the bottom rack of your oven and turn the oven to 400 degrees.
Brush the loaves with cold water. (Normally in hearth bread you would lightly slash the tops of the loves about 3 times diagonally, but that did not work well on this bread, so skip this step.)
Bake the loaves at 400 degrees for 35-45 minutes.
 |
| My round (-ish) loaf. See what I mean about not slashing the top? |
Let cool, slice, and devour!
I am not the only one giddy about this recipe...


I love that this worked, Sara! Your kids' faces say it all - what fun you are creating for your family - and good taste, too, it sounds like! Congrats on a successful failure!
ReplyDelete